

How To Clean Epson Ff 680w
 Earlier this year, I was offered the loan of an Epson FastFoto FF-680W photo scanner to try out and blog about. The offer coincided nicely with the discovery, while I was cleaning out a seldom-used closet of a cache of photos from the 1980s and 1990s, documenting my 20s and 30s. I am not a photo album person–I've created probably two albums in my life. But I knew that storing these photos in photo boxes (some organized, some not) meant that I wasn't looking at them. So I liked the idea of scanning them.
To be honest, I was thinking of my organizing blog, not this one, when I decided to accept the offer of the loan of the scanner. So last month I posted my review there. (Spoiler alert: I liked the scanner!) But it just occurred to me that readers of this blog, who certainly have photos to deal with, might also be interested in the review. So I'm basically reposting it here.
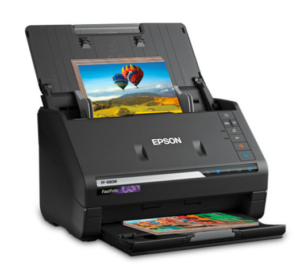
I scanned hundreds of photos with this handy little scanner. It's a sheet-fed scanner (like a fax machine), so it handles prints only. The photos I was scanning were relatively new and were not fragile, so I had no hesitation to put them in the sheet feeder. Based on my experience, though, I think I'd be comfortable putting old photos in the sheet feeder, as long as they weren't crumbly or torn. The scanner does come with a carrier sheet for more delicate photos, though I didn't try it.
The scanner has software that allows for easy organization of the digital photos, assuming you've already taken the time to organize the prints. As I explained in a post on my organizing blog, I went through my photos and grouped them into categories that made sense to me. The software is set up so that you can assign a year (or a decade), a month (or a season), and a description to each batch. The description becomes the folder name and the year, month and description, followed by a number become the file names for each photo in the batch, which are numbered sequentially.
Here's a photo of the screen where you make those selections:
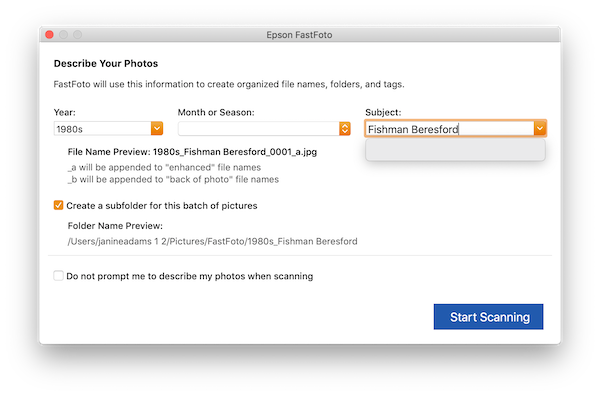
It's quite simple. If you finish a batch and later find photos that belong in that folder, it's easy to just make the same selections and they'll be added to the folder.
If I were scanning photos of ancestors–particularly if it wasn't a large volume–I might bypass the built-in naming method provided by the scanner software and instead name them individually use the file-naming protocol (Date Type of Document-Ancestor Name-Locality) that I use for my genealogy documents.
For my snapshots in this scanning project, once I got past the idea that I needed to name every photo (again, see my previous post on my organizing blog), the process went quickly. The scanner is well named. It's really fast!
Please note that the photos should be inserted face up, so that they the rollers do not come in contact with the photo. As noted in the comments below, some people have experienced scratching of photos, most likely because they were inserted face down. Photos should also be inserted in a landscape orientation. When I scanned the photos, I inserted them improperly and risked scratching. Thankfully, my photos weren't scratched. I had originally posted a video of the process to show the speed of scanning but have removed it so as not to be demonstrating improper insertion of the photos.
I was scanning snapshots at 300 dpi, so it's a bit hard to evaluate the quality of the scanned photos. I did use the auto enhancement setting so that I would get a duplicate, enhanced version of any photos that started out sub-standard. These photos were color corrected and red eye was eliminated. Pretty cool.
I choose to store my photos on my hard drive, but the software allows you to upload your photos to Dropbox or Google drive with a click. There's also a sharing button for easy sharing via Facebook or email. I chose to store the folders in my folder structure on my Mac, but there is an option for saving it to the Photos app.
At $529, this isn't a scanner for the casual or infrequent user. But if you have a lot of photos to scan, it might be something to consider. It's fast, easy to use and virtually trouble free.
The Epson FastFoto scanner made a project I'd been putting off really easy. I had no trouble organizing my prints—I broke that project into little pieces and really enjoyed looking at a the photos—but I had really dragged my feet doing the scanning. That's a shame, because it turned out to be a breeze!
How To Clean Epson Ff 680w
Source: https://organizeyourfamilyhistory.com/review-of-the-epson-fastfoto-ff-680w-photo-scanner/
Posted by: robinsonfuld2002.blogspot.com
0 Response to "How To Clean Epson Ff 680w"
Post a Comment